|
|
|
|||||||||||||||||||||||||||||||||||||||||||||||
|
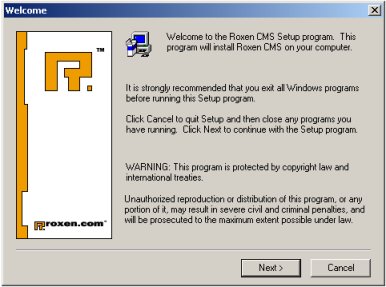
Software InstallationThe software installation installs Pike and Roxen WebServer on your system. It is either done through a binary or source package. Binary packages are precompiled for each operating system and are the easiest to install. Source packages are compiled by the user and require a complete development environment. They are for people who want full control over what they install, or a last resort if a binary package fails. Windows Binary InstallationStart the Roxen WebServer installation by double clicking the installation file. The installation wizard will provide instructions for how to complete the installation.
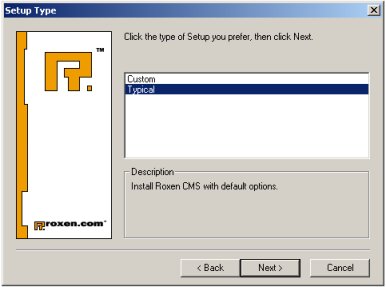
If you want to change any of the settings below, use the "Custom" option.
Settings for the "Typical" installation option:
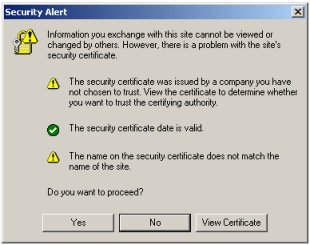
The only settings that needs to be manually entered in the "Typical" installation is a user name and password for the administrator. After you have entered the necessary settings, the installation wizard will proceed by installing all necessary components. A Command Prompt window will open temporarily as the server starts. Your default web browser will now start and load the web based administrative interface. If you have chosen to run the administrative interface over the secure https protocol a warning may be displayed. Since this is your own site, it's safe to click "Yes" here.
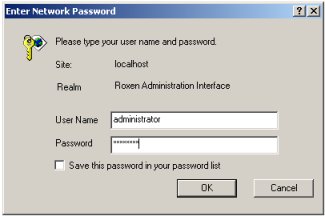
Enter your chosen administrator name and password to log on to the administrative interface and continue setting up your site. See the following chapters for information on how to do this.
Unix Binary InstallationThe Unix binary release is distributed as a self-installable archive, actually a combination of a sh-script and a tar archive. The result is an executable with its own installation script that guides you through the installation. During the installation process the install script will create and extract files to a temporary directory. It will create the directory in the current directory. The installation script will tidy up after itself, but if it is not able to it is safe to remove a directory with a temporary sounding name like DtmPf4a2b26/. To install the binary release, simply run the archive:
Then press enter and accept the license text by answering yes. It will take a while for the script to extract the Pike binary and start the real installation script. When it has finished it will prompt for the location of your installation:
If you do not enter anything Roxen WebServer will be installed in /usr/local/roxen/. Roxen WebServer is always installed in a directory called roxen. For automatic updating just enter the same location as the old installation. The old installation will be kept, but make sure the old server is not running. For more information see the Updating chapter. Now the actual installation of the software will take place. This takes a while and shows nice progress bars. Next the installation script will create an administration interface server. If the installation updates an existing installation it will skip this step. The script will prompt for the name and URL of the administration interface server, as well as the user name and password for an administraion interface account.
The https protocol should be used for the administration interface, otherwise it might be possible to eavesdrop on it. To make it secure it is not enough just to choose a https URL, it is also necessary to create a new certificate, since it will use the insecure demo certificate by default.
The last stage of the installation process asks whether your Roxen WebServer server will connect to the update server at roxen.com automatically or not. If you allow it the builtin update client will fetch information about new software and updates as well as news about Roxen WebServer. The information will be displayed in the Admin tab of the administration interface. If you do not allow this it is still possible to use the update client. It will then connect to the update server and fetch information when you tell it to. The disadvantage is that you will not get automatic alerts about new security fixes and other important news. If you have a Roxen Community user you can let the update client connect with your user name and password, to let it download packages that require authentication. The Roxen Community, http://community.roxen.com/, is a community for Roxen users. The update server is part of Roxen Community.
The last question is for users who run their Roxen WebServer server behind a firewall. Then it might be necessary for the server to use a proxy like any web browser between a firewall. With this the installation script has all the information it needs. It will finish the installation and start the Roxen WebServer server. Further configuration is done by connecting to the administration interface, the installation script prints the URL. If it is not possible to connect to the administration interface, the debug log file should give clues to what went wrong. It is located at roxen/logs/debug/default.1.
Unix Source InstallationThe Unix source release is distributed as a tar.gz archive. It contains the source code for the Pike interpreter, necessary libraries and the Roxen WebServer server itself. The installation will work on any system, but libraries for all supported functionality is not included. Thus libraries for native database support, for image file format support (TIFF, JPEG), TrueType rendering, Java, or GTK/GNOME support are not included. If you are installing on a Linux or FreeBSD system most libraries will be shipped with the distribution. The commercial Unix system does however usually not ship these libraries, so you will have to install them yourself. It is necessary to install the external libraries before you install Roxen WebServer. If you later find out that some function is lacking because of a missing library you will have to reinstall Roxen WebServer, or rather the Pike interpreter. A reinstallation is done in the same way as an installation and does not affect the web sites you have created. The installation script will find the previous installation of Roxen WebServer and upgrade rather than overwrite it. The installation process consists of four steps; configuration, compilation, software installation and Roxen WebServer installation.
The configuration is done automatically by a script created with GNU autoconf. It finds out about your system and how to compile on it. It will find which libraries are installed and if they can be used. Usually this will be fully automatic but in some cases it might be necessary to manually force the configuration system to find some libraries. Use ./configure --help for a list of configurations options.
The configure script produces a log about what happens. A longer version of the log is also stored as config.log. If the configure script failed to find a certain library that does exist the config.log file will give you valuable clues to why, and what you can do to fix it. Once you have fixed the problem you can run configure again.
After the software is configured, it is time to compile it. This is done by invoking make which will in turn use the necessary compilers, linkers and whatnot. The compilation takes a while and produces another long log of information. Usually all messages can be ignored, but in case of errors they will provide important clues to what went wrong.
When the software has been compiled it is time to install it. This is usually done by make install. The make command, that is used to handle the compilation process, is used to handle the installation process as well. The software will be installed in the directory that you specified with the --prefix= argument to configure, by default /usr/local/. Roxen WebServer and Pike will both be installed separately, in their own directories (pike/ and roxen/). A link to the pike binary will also be created in bin/. The roxen directory can later be moved anywhere on your system. However the pike directory cannot be moved. In case you want Pike and Roxen WebServer in different places you should set the --prefix= argument to the configure script for Pike, not Roxen WebServer. Upgrading to a newer 2.x release, or reinstalling the same release, is also done with make install. Only the roxen/server/ directory, that contains the actual software, will be affected. No logs, configurations or user data will be touched. After the installation the old version of the software will be moved from roxen/server/ to roxen/server.old/. The installation also produces a progress log that is mainly interesting in case of errors.
The next step is to create an administration interface server. If you are upgrading or reinstalling you do of course not need to, your old configuration will do. This is done by invoking the create_configinterface script located in the roxen/server/ directory. If is the same script that is used by the binary installation, so we won't describe it in detail again.
The last step of the software installation is to start the server and connect to the administration interface. This is done by invokning the start script in the roxen/server/ directory. The progress of the server can be seen in the debug log, roxen/logs/debug/default.1
|
|||||||||||||||||||||||||||||||||||||||||||||||||